Kinotomo Audio (eng)
KinotomoAudio — User Guide
Kinotomo Audio is a Python program that uses FFmpeg to process the audio track of video files.
Here is how to use it.
Image 1
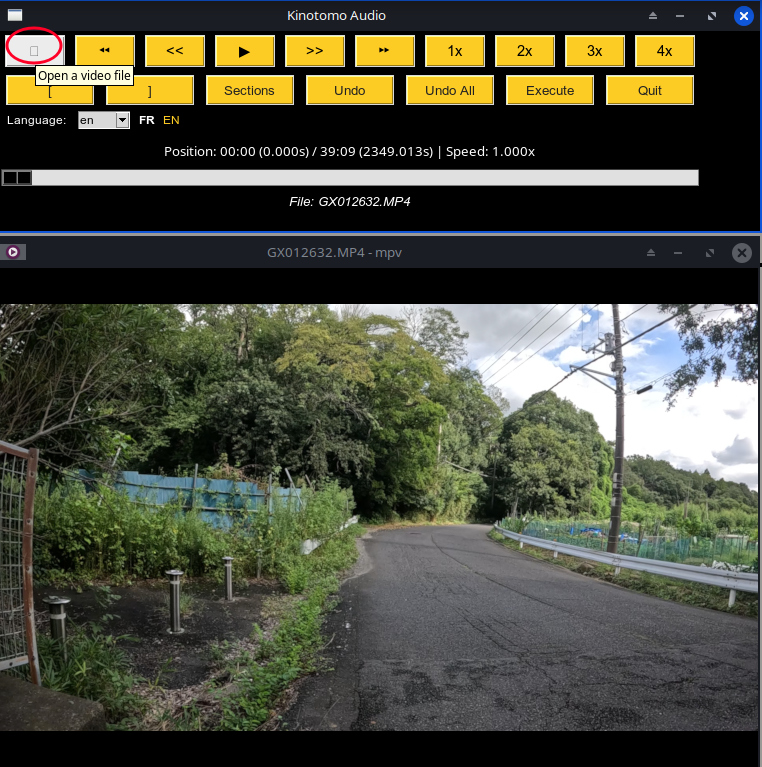
First, I open an MP4 file using the leftmost button on the first row of buttons.
The main interface at the top contains two rows of buttons, a language selection row (English or French), a row displaying the playback position and playback speed, and finally the name of the file.
The MPV player is displayed below this main interface.
Image 2
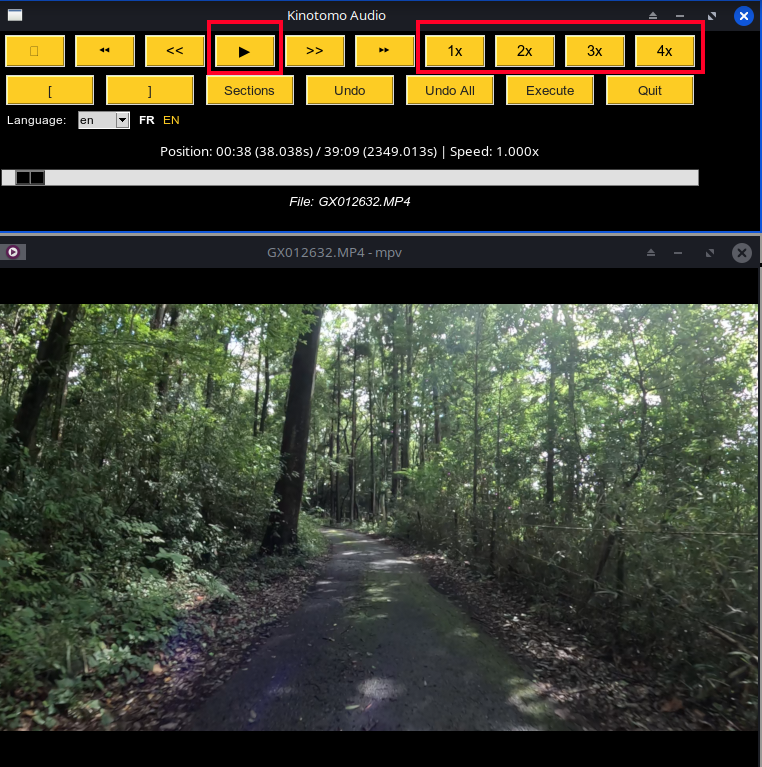
There are two ways to move through the video: using the Play button or pressing the Space key on the keyboard.
The 1x, 2x, 3x, and 4x buttons change the playback speed. This allows you to move through the video at the speed you prefer in order to find the parts where there is unwanted noise.
Another way to move quickly through the video is to use the arrow keys on the keyboard.
Image 3
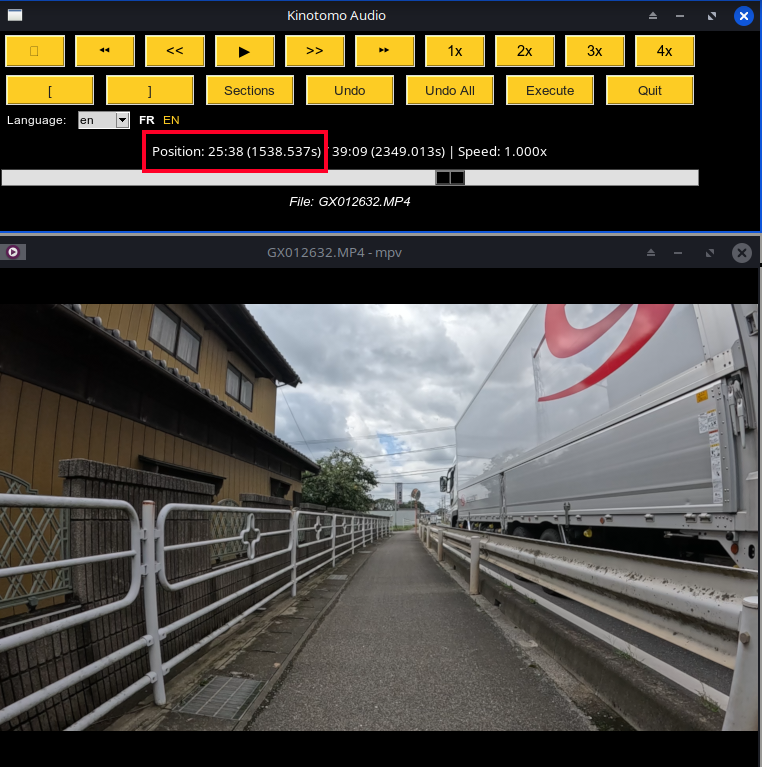
In this video, a noisy truck overtakes me at around 25:38. I heard it coming from behind, so I will rewind the video to find the point at which I first started hearing it.
Image 4
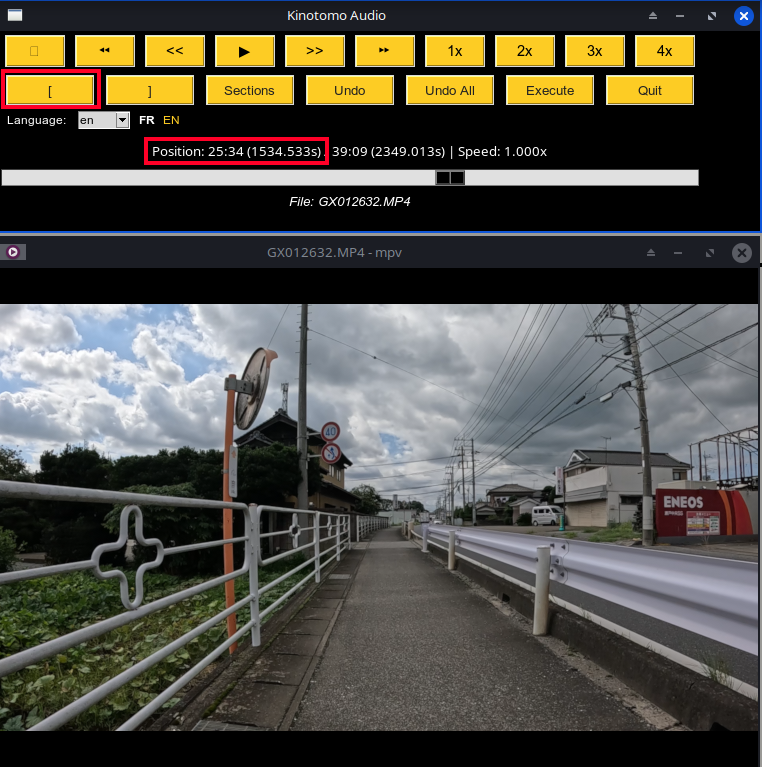
I have rewound the video to 25:34. The truck behind me is not audible yet.
I therefore click the "[" button, or press the I key on the keyboard (for “In”), to specify the starting point of the audio processing.
Image 5
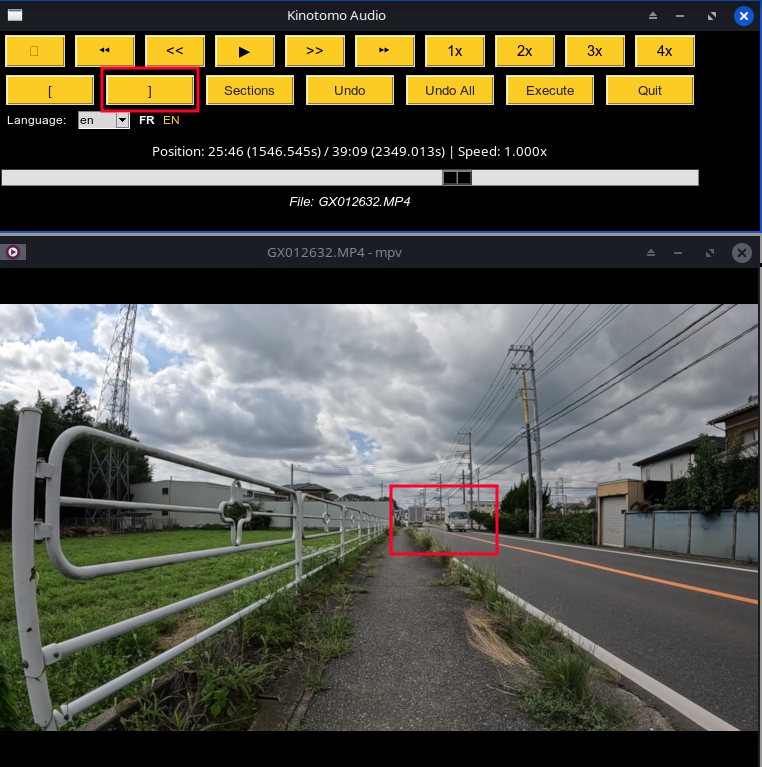
I move forward through the video until the point where I can no longer hear the truck, then click the "]" button or press the O key on the keyboard (for “Out”).
Image 6
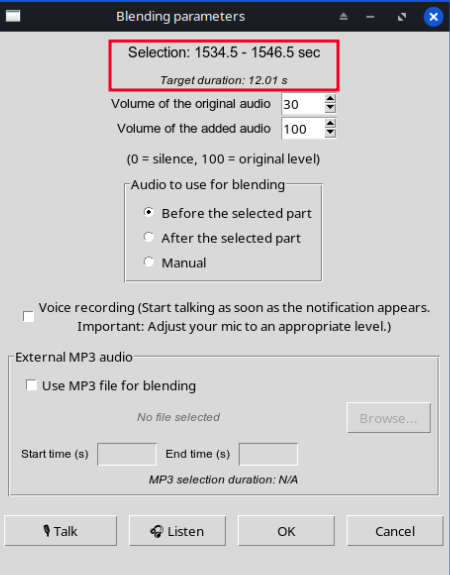
The settings window appears. It indicates that I am going to process the audio from 1534.5 seconds to 1546.5 seconds in the video, for a total duration of 12.01 seconds.
Image 7
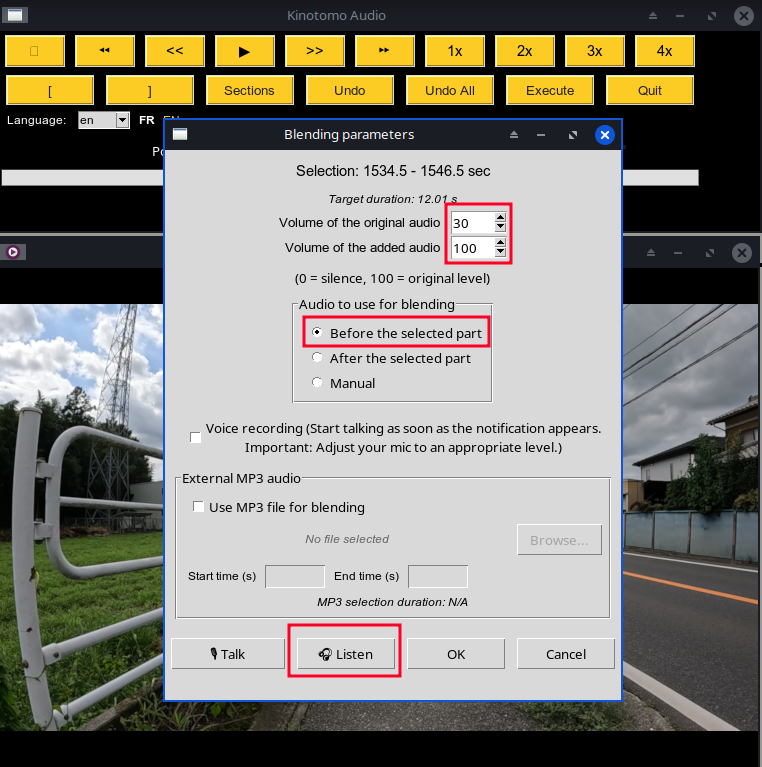
In Image 5, I noticed that another noisy truck was approaching. I also know that there was no traffic on the road before 1534.5.
I will therefore select “Before the selected part”.
Since I want the result to sound natural, I will set the original audio to 30% and the audio from before the selected 12.01-second section to 100%.
I then click Listen to hear what the result will sound like.
If the result is satisfactory, I click OK. Otherwise, I change the settings and listen again.
Image 8
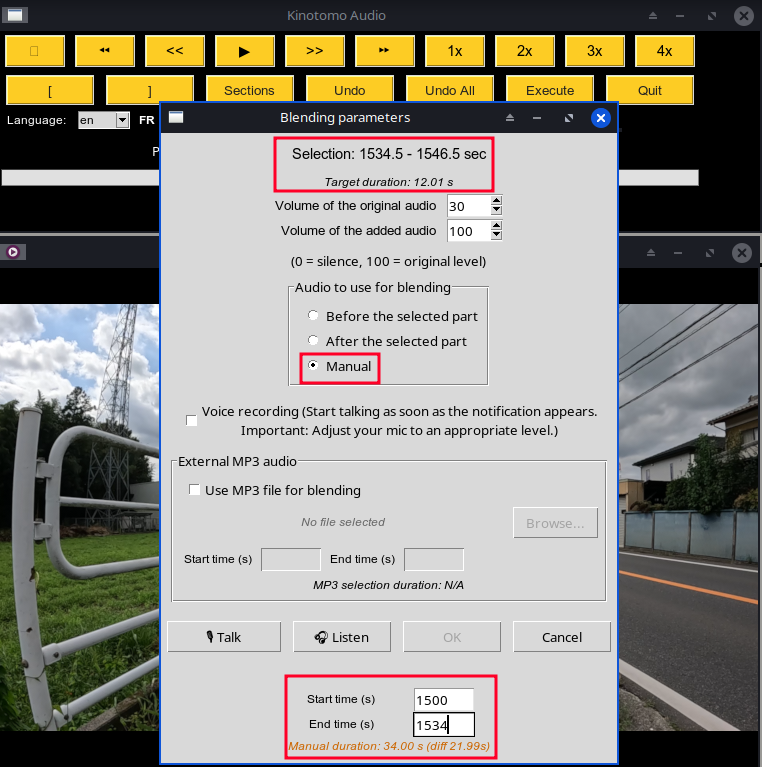
If there is too much noise before AND after the selected section, I can choose the “Manual” option to specify a different section of the video. This section is manually specified at the bottom of the window, in seconds.
In the example shown in Image 8, I entered 1500 as the Start time and 1534 as the End time.
The program warns me, in orange, that the duration is incorrect: the selected section is 21.00 seconds too long.
I therefore need to adjust these values until the duration exactly matches the target section to be processed (12.01 seconds).
Once the correct duration has been entered, I can click Listen to check the quality of the result.
Image 9
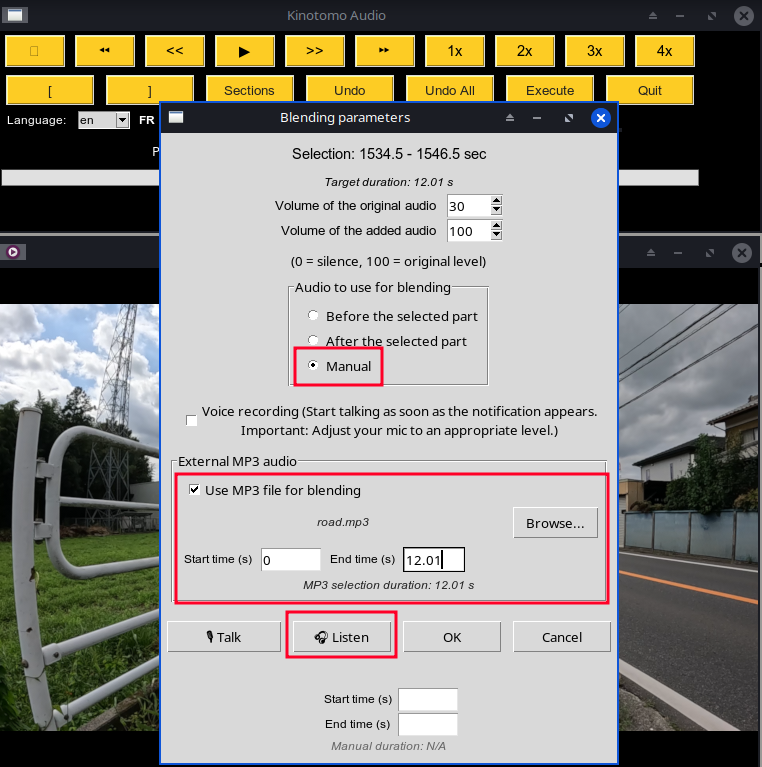
Another option is to use the audio from an MP3 file.
This is useful if I have created a small collection of audio recordings extracted from my other videos — for example, recordings of a quiet road, a field, a river, and so on.
In this example, I select the road.mp3 file, in which I am riding on asphalt with little wind noise.
I use the first 12.01 seconds of this file, then click Listen to check the result.
I can then listen to the result and, if necessary, adjust the audio levels instead of using the default values of 30% and 100%.
Image 10
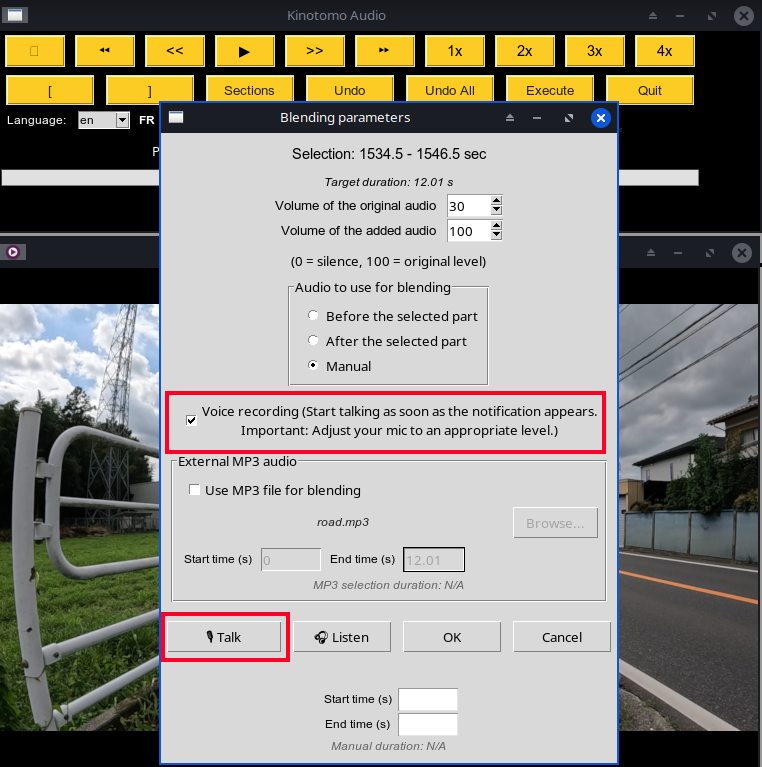
I never use this option myself, but I created it for people who want to make coaching videos in which they give spoken instructions without removing the surrounding sounds.
In this example, my voice is recorded when I click the Talk button. The recording stops when it reaches 12.01 seconds.
I can then listen to the result using Listen and, if necessary, adjust the audio levels instead of using the default values of 30% and 100%.
Image 11
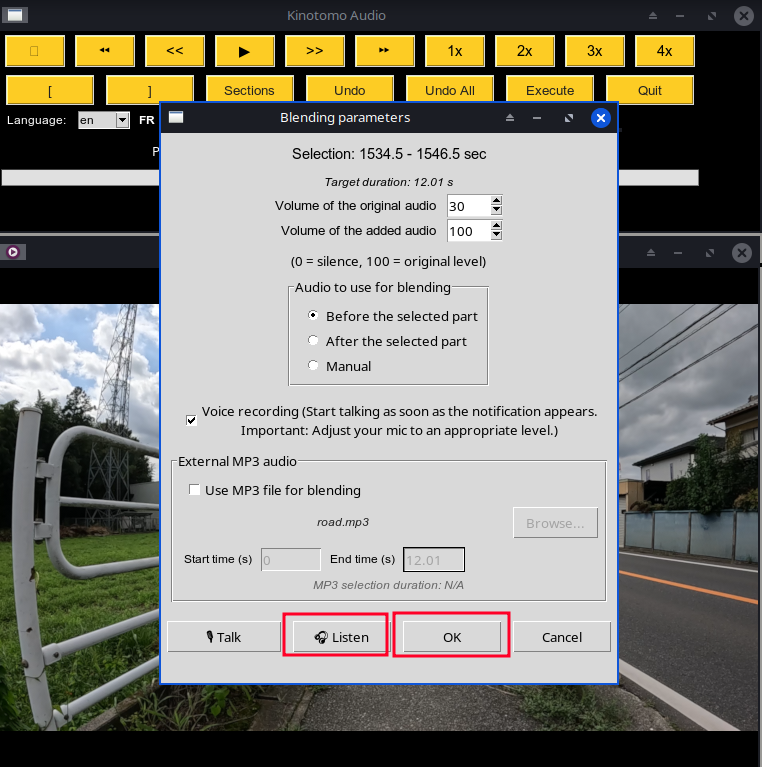
Once I am satisfied with the result obtained with Listen, I click OK.
Image 12
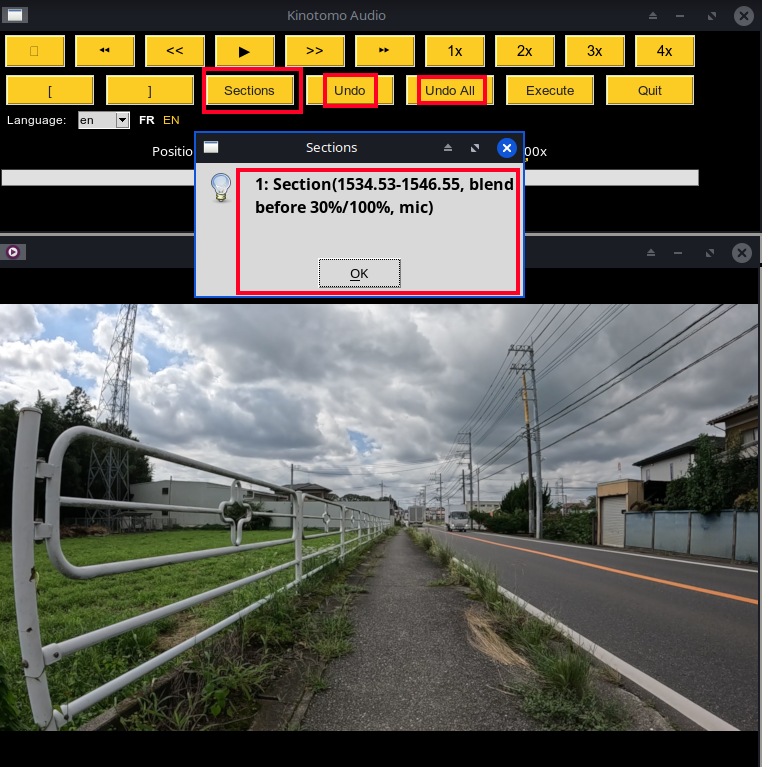
The settings window closes, and I can click the Sections button to check the selected sections.
If everything is correct, I click OK.
If there is a problem, I can click Undo to cancel the last operation and start again.
I can also click Undo All if I have several sections, as shown in Image 13.
Image 13
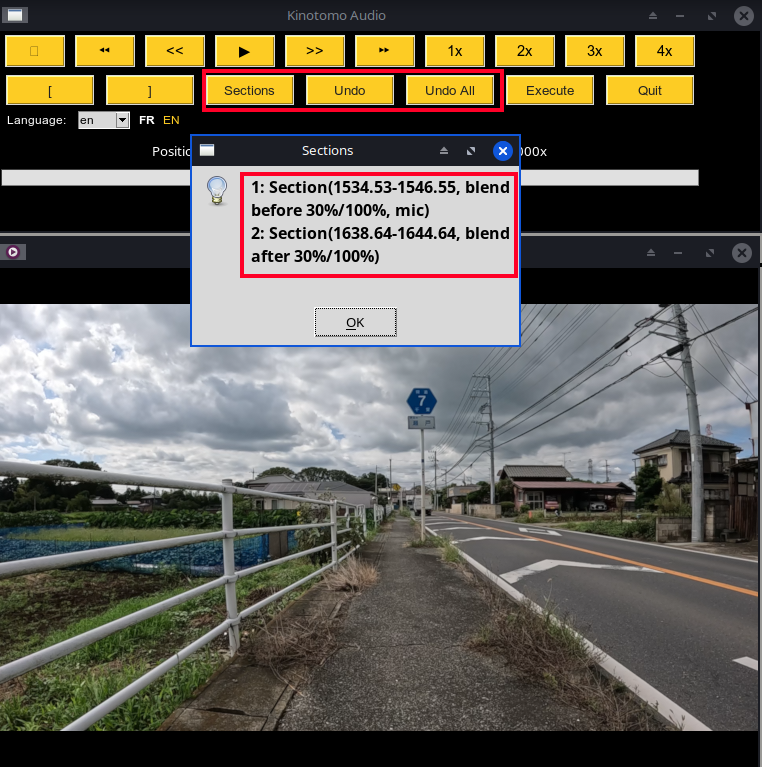
Image 14
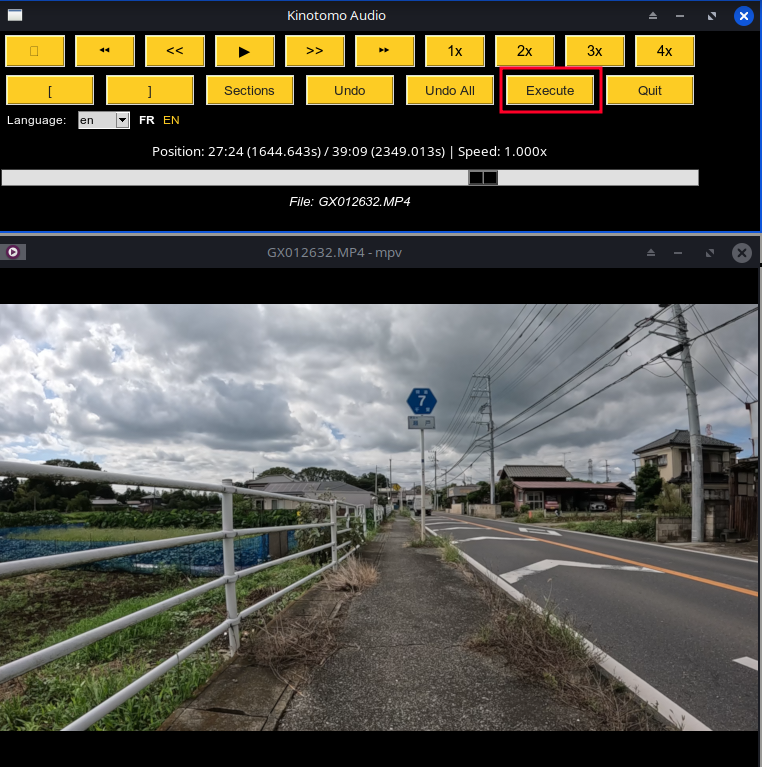
Once all the sections have been specified, I click Execute.
Image 15
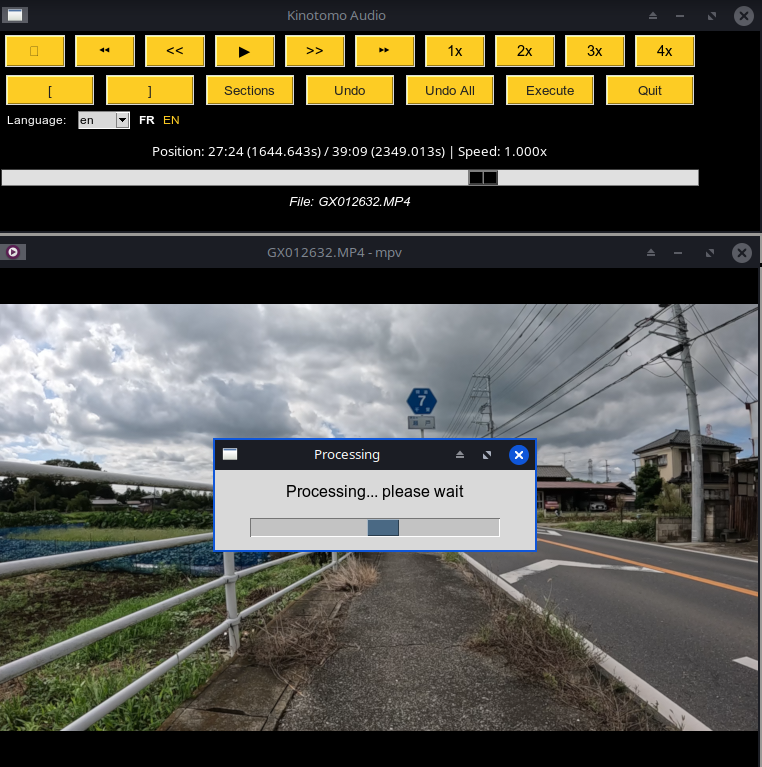
The mixing process begins.
The audio track is processed, while the video track remains unchanged.
Image 16
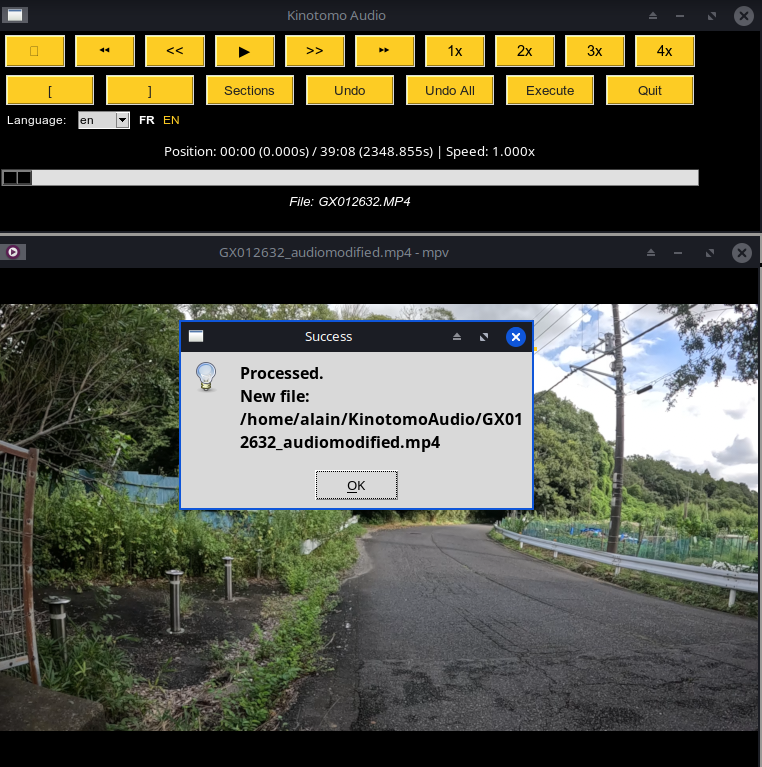
Once the mixing process is complete, a window informs me that the processing was successful and displays the path to the newly created file.
Note about keyboard shortcuts
For the keyboard shortcuts to work correctly, the main interface must have focus.
Otherwise, if the MPV player window has focus, MPV’s default keyboard commands take priority.
Therefore, if you have clicked on the MPV player window, you need to click on the main interface again to regain control of playback using Kinotomo Audio’s keyboard shortcuts.
A video file processed with Kinotomo Audio is available here.
Notez le n° de billet qui figure ci-dessus. Le formulaire s'ouvrira dans une nouvelle fenêtre.